Set up a Jekyll web development system
This article describes how to set up Windows Subsystem for Linux (WSL) on Windows 10 and then install Ubuntu Linux, Ruby, and Jekyll to create a web development system. The purpose of the system is to test documentation before you publish to a GitHub Pages repository to build a website. If you choose to customize your Jekyll configuration, this test system is useful to develop the site and verify the changes before you upload to your live website.
You can copy and paste the commands from this article into your PowerShell and Ubuntu shell sessions. The commands include the following syntax:
sudoprompts you for your password but runs commands with administrator permissions.&&indicates that a command must be successful before the next command is run.--yessuppresses prompts and accepts changes.- Angle brackets
<>are a placeholder for your input. Replace the placeholder value and brackets with your value.
Windows 10 includes Windows PowerShell 5.1 that can run the WSL commands used in this article. This article uses PowerShell 7. If you plan to write scripts, do system administration, or deploy cloud resources install the most recent version of PowerShell 7. For more information, see Migrating from Windows PowerShell 5.1 to PowerShell 7.
Set up WSL
WSL allows you to run Linux and Linux command line applications on a Windows 10 computer using a Bash shell. This article uses WSL 1 and if you want to compare WSL 1 and WSL 2, see Comparing WSL 1 and WSL 2. For more details about the WSL 2 installation procedure, see Windows Subsystem for Linux Installation Guide for Windows 10.
Enable WSL
In this section you use PowerShell commands to enable WSL 1.
-
Start an elevated PowerShell session by doing a right-click on the PowerShell icon and selecting the option to Run as Administrator.
-
Verify that WSL is disabled on your computer with a PowerShell command.
(Get-WindowsOptionalFeature -Online -FeatureName Microsoft-Windows-Subsystem-Linux).StateFor more information, see Get-WindowsOptionalFeature.
-
Enable WSL and restart the computer.
Enable-WindowsOptionalFeature -Online -FeatureName Microsoft-Windows-Subsystem-Linux -AllFor more information, see Enable-WindowsOptionalFeature.
Install Ubuntu Linux
There are several Linux distributions available in the Microsoft Store. This article uses Ubuntu Linux 20.04 LTS.
- In the Windows Taskbar search field, enter Microsoft Store.
- In the store application, search for Ubuntu 20.04 LTS.
- Download and install Ubuntu with the Get button. If you did a previous Ubuntu installation, the button is labeled Install.
- To start Ubuntu in a Bash shell, use the Launch button. The Ubuntu installation begins.
-
To set up a Linux user name and password, follow the prompts. After you sign in to Ubuntu, you’ll see messages that updates are available.
1 update can be installed immediately. 0 of these updates are security updates. To see these additional updates run: apt list --upgradable The list of available updates is more than a week old. To check for new updates run: sudo apt update -
Install the updates. The process takes several minutes and has verbose output.
sudo apt update --yes && sudo apt upgrade --yes- The
apt updatecommand refreshes the list of available package updates. - The
apt upgradecommand installs the updates.
- The
Install Ruby
Jekyll is a Ruby application so you need to install Ruby. This example installs Ruby from Brightbox as mentioned in the Jekyll documentation. Brightbox maintains the Ruby packages and the repository provides a complete Ruby installation that meets the prerequisites for Jekyll.
-
Set up the Brightbox repository and update the packages and versions that are available.
sudo apt-get install software-properties-common && sudo apt-add-repository ppa:brightbox/ruby-ng --yes && sudo apt-get update -
Install Ruby and other essential packages such as GCC, G++, and Make.
sudo apt-get install ruby2.7 ruby2.7-dev build-essential dh-autoreconf zlib1g-dev --yes -
Verify the installation of Ruby and the other essential software.
ruby --version &&
gcc --version &&
g++ --version &&
make --version
The output includes detailed information, but the important lines will look similar to the following versions:
ruby 2.7.2p137 (2020-10-01 revision 5445e04352) [x86_64-linux-gnu]
gcc (Ubuntu 9.3.0-17ubuntu1~20.04) 9.3.0
g++ (Ubuntu 9.3.0-17ubuntu1~20.04) 9.3.0
GNU Make 4.2.1
Gems
After Ruby is installed, update the default gems that were installed. Gems are applications that do specific tasks or add functionality. Most gems have dependencies with other gems. For example, the Jekyll gem page lists its dependencies.
Ruby installs the default gems in /usr/lib/ruby/gems/2.7.0/gems/ and the updates are installed in /var/lib/gems/2.7.0/gems. To update files in those directories,
sudo is needed.
Update .bashrc
The .bashrc update is optional but recommended because it allows you to install gems in your
Linux user directory so that you don’t need to use sudo. For more information, see the Jekyll
recommendation for an Ubuntu installation.
To update .bashrc and your Linux path run the following commands:
cp $HOME/.bashrc $HOME/.bashrc-backup &&
ls -lah $HOME &&
echo '# Install Ruby Gems to ~/gems' >> ~/.bashrc &&
echo 'export GEM_HOME="$HOME/gems"' >> ~/.bashrc &&
echo 'export PATH="$HOME/gems/bin:$PATH"' >> ~/.bashrc &&
source ~/.bashrc &&
echo $PATH
The commands do several tasks:
- Make a backup of .bashrc.
- List the files to verify the backup was successful to .bashrc-backup.
- Update .bashrc with the
PATHstatements to install gems to your user directory. - Run the
sourcecommand to update the path in the current shell. - Display the updated path. The path should show /home/<user name>/gems/bin: as the first item.
If
source doesn't update the path, type exit to close the Linux shell.
Launch Ubuntu and the shell will start with the updated path.
Update gems
Update and view the list of installed gems.
gem update && gem list
For more detailed information about a specific gem, such as the version or installed location, use
the --details option.
gem list bundler --details
Install Jekyll
After your Ruby environment is setup, install the gems for Jekyll, Bundler, and GitHub Pages.
-
Install the gems.
gem install jekyll bundler github-pages -
Verify the installation.
jekyll --version &&
bundler --version &&
github-pages --version
You’ll see output with version numbers for each application.
jekyll 4.2.0
Bundler version 2.2.11
github-pages 212
Create a test website
To test Jekyll, create a new directory, build a default site, and start a local instance of Jekyll server.
-
In your
$HOMEdirectory, create a test site in a new directory named testsite and start the Jekyll server.cd $HOME jekyll new ./testsite && cd ./testsite && bundle exec jekyll serveWhen the Jekyll server starts you’ll see several messages similar to the following output. The
Server addressis your local website address.Configuration file: /home/<user name>/testsite/_config.yml Source: /home/<user name>/testsite Destination: /home/<user name>/testsite/_site Incremental build: disabled. Enable with --incremental Generating... Jekyll Feed: Generating feed for posts done in 0.423 seconds. Auto-regeneration may not work on some Windows versions. Please see: https://github.com/Microsoft/BashOnWindows/issues/216 If it does not work, please upgrade Bash on Windows or run Jekyll with --no-watch. Auto-regeneration: enabled for '/home/<user name>/testsite' Server address: http://127.0.0.1:4000/ Server running... press ctrl-c to stop.Tip
You might see several warning messages such aswarning: already initialized constant. These are common messages and shouldn't indicate a problem. If you have concerns for your environment, research the messages and confirm there's no problems for your computers. -
To confirm the site is running locally, open a browser and navigate to
http://127.0.0.1:4000to view the default Jekyll site.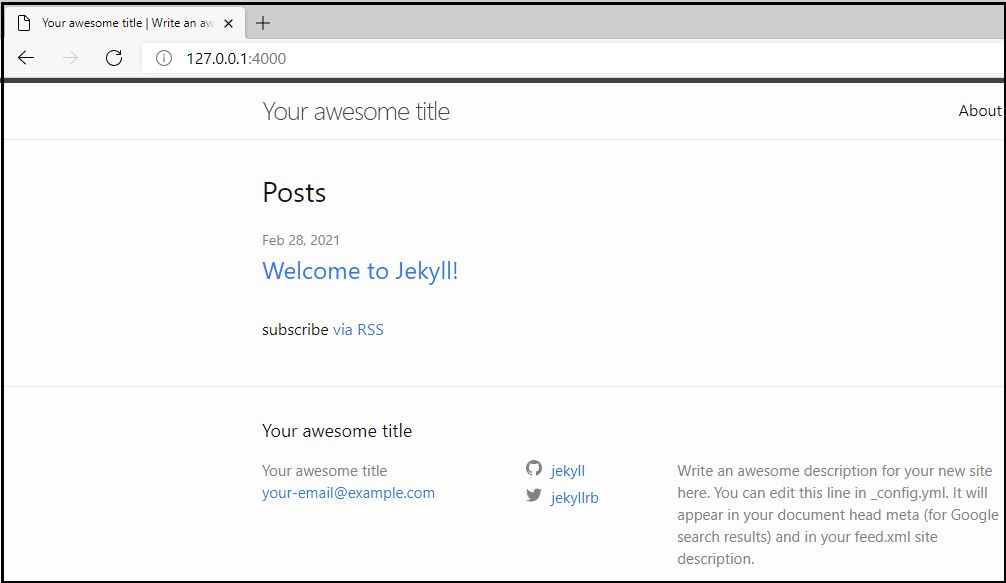
Edit website files
After you confirm that your Jekyll environment is functional you can set up a GitHub Pages repository and clone the repository to your Windows computer. When you’re ready to test your website the safest method is to only update files on your Windows system. Then, copy files to Linux to test the changes.
To prevent file corruption or file locks, don't copy files from Linux to Windows, especially the .git directory. Doing so might corrupt your git repository or destroy commit history.
The following tips should help you get started to copy updated files from Windows to Linux:
-
From your Windows system copy your cloned repository directory to your Linux
$HOMEdirectory. You can access the Linux file system from Windows Explorer using the path\\wsl$\Ubuntu-20.04. -
The repository directory that you copied to the Linux system is owned by
root. To fix that and the Gemfile.lock error that occurs if you attempt to run the Jekyll server, update the permissions.sudo chmod -R 777 $HOME/<your repository name>The command gives all Linux users read, write, and execute permissions to the directory and its subdirectories.
-
On your Linux system the repository’s .git directory isn’t needed and can be deleted.
rm -r $HOME/<your repository name>/.git -
When you’re satisfied that the files you updated on Windows are ready for publication, commit your changes and push the updated content to your remote repository. Your GitHub Pages site will build with the updated content.
Shut down the system
When you’re finished, type these commands to shut down the Linux system:
| Operation | Command |
|---|---|
| Stop the Jekyll server | Ctrl + C |
| Exit Ubuntu Linux from Bash | exit |
| Shut down WSL from PowerShell | wsl --shutdown |
Run a command from PowerShell to confirm WSL is shutdown and it’s state is Stopped:
wsl --list --verbose
  NAME            STATE           VERSION
* Ubuntu-20.04    Stopped         1
Clean up
If you no longer need your Linux test system, uninstall Ubuntu 20.04 LTS.
- In the Windows Taskbar search field, enter Apps & features.
- Search for Ubuntu 20.04 LTS.
- Select Ubuntu, then select the button to Uninstall.
Conclusion
In this article you built a web development system on Windows 10 using the Windows Subsystem for Linux, Ubuntu Linux, Ruby, and Jekyll. You verified that the system is functional and ready to test documentation and the website configuration before publication to GitHub Pages.